 It comes with a special high-wattage wall power supply so you can keep EvoArm running. One of the buttons is for recording the servo positions, and the other is for restarting recorded servo positions. Or, write your own AI algorithm to come up with new songs and have EvoArm play them! Yes! The Robotic Arm code can be seen as a series of servo motors working together to simulate human movements. Whether you are already a pro, or a complete novice, Unlimited Rapid Support From Mountain View, California. If you choose to 3D print, no worries.
 For truly unlocking its features, it can be programmed with Python, C++ or any language that supports publishing ROS messages, Face Detection, Object Detection, 30fpsstreaming feed, and more, A fresh take on this classic computer science problem, Program the Tic-Tac-Toe Algorithm and play against EvoArm, Includes everything you need to get started. If you know ROS, you can make the raspberry-pi the ROS master and publish commands from your own computer. There is a list of different Robots that use servo motors, so the theory of what were building still applies. ), Note: Capital F (finger) represents the opposite direction of the servo motor spin. The code implements a hard stop, to stop the Motor from exceeding its maximum angle, which can strip the motor gears. The time taken to print can up to 40 hours. I wanted to be sure you knew we are still enjoying the robot arm kit. The Robotic Arm is fully customizable. Can it pick up and place objects repeatedly with good accuracy? You can subscribe to the my YouTube channel for more tutorials and projects. Did you make this project? f: 40, 120 #gripper, smaller value closes.
However, it will require some work to move complex objects, or even compete with the million-plus year human beings have on dexterity although spending more time working on the code, the Robots precision can be is works as intended for MARK 1i. What else do I need to buy to make it work? Staying true to Iron mans suit convention, each iteration would be known as Mark. If you want, you can use other PWM inputs of the Arduino, The servos power and GND inputs connect to the +V and GND input of the power adapter on the breadboard.
 Find More Details on the original article. The code implements a hard stop to stop the Motor from exceeding its maximum angle, which can strip the motor gears. vJ(^_&K(J(k(yRzd6 PyVK?v ],"3#c3OG[ :kXnk You may be wondering, what sensors does the Robotic Glove use? The Robotic Gloves Arduino uses sensors to communicate with the Robotic Arm Arduino and sends data to move a Servo to the desired angle.
 The Robotic Glove was an aesthetic addition to the project, but you can just as well use a builders glove to implement the Robotic Arm. Use our example provided note playing sequences, and stitch them together to play your own desired song. Upto 30fps streaming service, 2. I used 4 DOF simple robot arm for this project, but you can use any robot arm. If the value of the servo motor is less than the maximum rotation, continue spinning. 0x40 Address is the default I2C Address. In effect, manually controlling a Robotic Arm.
You can also find my remixes for a Robotic Arm Camera Stand. A Stepper Motor (NEMA-17) can be used due to its precision and high torque, helping the Robotic Arm rotate seamlessly to gesture controls. Yhi,4q+PGCv~.,.m]NooskECfVv60~j7]^q mkXtB The value f would be sent by the robotic glove (via Bluetooth) whereby the Robotic Arm would read this data and trigger a function to rotate the respective servo motor. Refined with the input of hundreds of users, EvoArm is designed to give you the best deep dive into robotics from low-level electronics to high level programming. Well cover this more in a future release. The payload limit is 100g at full extension. Swf.H! A unique approach to building "real" physical apps. Can I create and save a sequence of actions to be executed by the arm on demand? Overall, were sending a signal (over Bluetooth) from the Robotic Glove to the servo motor. To rotate the Robotic Arm, a more robust motor than a servo motor would need to be used. And that's just one of the things EvoArm can do. If true, well store the incoming data in the state variable. Once built and configured, EvoArm can be controlled and programmed from a phone or computer using an intuitively designed interface without requiring coding. You can login to the included raspberry-pi and use the included python examples as a starting point. "My goal of having a robot on every desk and in every home, seems to be slowly taking shape", - See what else our CEO has to say in this news article, Programmable Robotic Arm With Arduino, Raspberry Pi & Camera, An Intelligent Robot You Can Compete With.
You can buy any typical robot arm kit off the internet. EvoArm comes with pre-installed advanced kinematics firmware. int response_time = 5; //Receiving values from the Robotic Glove interval, // Checks whether data is coming from the serial port, state = Serial.read(); // Reads the data from the serial port, Serial.print(state); // Prints out the value sent, if (Serial.available() > 0) { // Checks whether data is coming from the serial port, //For the naming of the motors, refer to the article / tutorial, //Move (Base Rotation) Stepper Motor Left. @support: We have been having trouble free use of the robot. The following represents a mapping table of the values sent to the Robotic Arm by the Glove. Arduino VCC and GND connect to VCC and GND of the breadboard, Power Adapter +V and GND connect to VCC and GND of the breadboard, Power Adapter GND connect to GND of the Arduino on the breadboard, Used two buttons.
What is the maximum width of open gripper? Yes. If you don't know ROS, you can also send arm commands over simple an extremely simple HTTP Rest interface. Does it run on batteries or a wall power supply? Based on the current states value, the servo Driver would send a signal to the respective Motor. This Robot Glove Exoskeleton design just blended well with the design of the Robotic Arm. This is an Arduino Robot Arm that can be programmed or even controlled by Hand Gestures. Your purchase includes the 4 EvoApps below. And With enough gestures, the robotic arm comes to life! And depending on the character given, well use this to move the motor(s).
One of the buttons is for recording the servo positions, and the other is for restarting recorded servo positions, The resistor connect to the one leg of the buttons (Other leg of the resistors connect to GND of the bradboard), Other legs of the buttons connect to VCC (+5V) of the breadboard, First button's signal leg connect to digital 12 input of the Arduino, Second button's signal leg connect to digital 13 input of the Arduino, Signal (middle) leg of the potentiometers connect to analog A0 - A1 - A2 input of the Arduino respectively, One leg of the potentiometers connect to GND input of the breadboard, Other leg of the potentiometers connect to VCC (+5V) input of the breadboard. For example, if we bend our fingers. EvoArm is designed for educational and learning purposes, it is not suitable for an industrial setup.
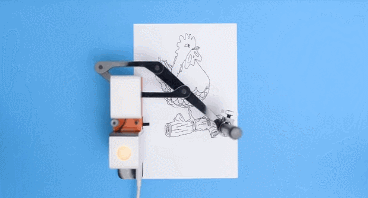
Get the Source Code - https://goo.gl/CKxHF1. The below wiring diagram shows the final assembly of all electronic parts to create a Robotic arm, including the Bluetooth module. Where servo_joint_3_max_pos is the maximum position of the Motor.
that can be customized, e.g., adding an LED, creating a camera stand Clamp: Robotic Glove Fully Assembled with Flex Sensor. Important: The Robotic Arm will only be as accurate as the robotic Glove controls, So its worth getting this right. The Robotic Arm is accurate enough to move objects. However, this cuts the cost of buying a Robotic Arm. Yes! Thank you. For truly unlocking its features, it can be programmed with Python, C++ or any language that supports publishing ROS messages, or making HTTP requests. A program on an external computer could control multiple arms together with arbitrary complexity. Raspberry Pi Camera You can access Wonder Tigers Robotic Arm from the Parts list. Go to my YouTube Channel - https://goo.gl/f0RHmR. A robot with the precision, accuracy, and intelligence to play real Tic-Tac-Toe against you, and win. You will need a phone or computer with internet connection, thats it. You can use USB via computer for to run of the Arduino board. How to connect a Servo Extension Cable. Raspberry Pi Zero W (with wifi and bluetooth capability, 16GB Micro SD Card with pre-configured Raspbian Buster OS, Robot operating system (ROS), and OpenCV 3.4, Computer Vision Kit Robotic Glove: The Robotic Glove.STL files (credits: Roman 13). But you should be use external power for to run of the servos. Below highlight the critical information. d: 10, 170 #wrist rotator This would help build an index of different versions and functionalities of the Robotic Arm. ;68B+ But once you build it, then what? The Following code outlines the Arduino reading the values of the sensors: Read the current position of the Accelerometer: The Following code calibrates to find the upper and lower limit of the Flex Sensor. When a game is over, it even resets the board so you don't have to do it! The kit comes with 16 detailed step by step tutorial videos of a few minutes each, which you can easily watch at your own pace. We can then send a specific value mapped of a gesture to the Robotic Arm to control a servo motor via Bluetooth. Robotic Arm: Thingiverse 3D Printed Robotic Arm (credits: Wonder Tiger): You can find more information on this build, along with the screw types from the parts above. Yes, once setup and configured, EvoArm connects to your local wifi network so you can control and program it from your phone or computer. If it has reached the maximum rotation of 180 degrees, stop. For the HCMODU0097 the default I2C address. Custom NanoLeaf Lights! DIY, Wireless, Modular, Arduino, 3D Printed! Well constantly check if the current value has exceeded the defined flexs upper or lower limit based on the calibration. In this project, a 5V, a 2200 mAh RC Battery was used. For MARK 1, we would be using Flex Sensors and an accelerometer (MPU6050). Where can I buy spare parts for this arm? for prototyping the Robotic Glove. if (servo_joint_3_parking_pos_i < servo_joint_3_max_pos) {. This Robot Glove Exoskeleton design just blended well with the design of the Robotic Arm. Z GrRY+ t9{zh0X[W-\WF&` This project is an attempt at achieving this. Can I create a custom Arduino program and run it via my own Arduino connected to the arm? The Robotic Glove consists of the following components: The following diagram is great to test the flex sensor and the Accelerometer. The code can be changed, if you add more component so make changes it.
I was able to install XQuartz on my Mac and then succeeded to display a camera image. For this project, this prototype (Mark 1) would be 3D printed as it gives me more space to create custom parts. Well cover the paring process below. Yes. However, well cover the key points: Note: 0x68 and 0x69 represent the I2C Address of the 2 MPU6050 Accelerometers. Does EvoArm allow simultaneous control of multiple servos? It can move pretty fast, faster than would be useful in most situations. Note: The code implements a hard stop, to stop the Motor from exceeding its maximum angle, which can strip the motor gears.
This measurement is then used to detect hand movement changes. Bnf2Ks{vi]cP=u7n8v{k.ZY5'YWV+nuZ/g>3{cF2p7]sfr3=\XflABY'g'#r~W}}le;6;[w .kM'ij?ojvs`C|]R;g0M_Esx; {wGmtaSu9o0Xm:X+|}6C6}/0PDmfl.) b: 10, 170 #shoulder Program a song once, then play it again using EvoArm. Use the included AA batteries to power the motors, and any typical portable USB phone charging bank to power the Raspberry Pi. Initialize the Serial Port at Baud Rate 4800 to start the Bluetooth communication. Watch videos of the arm playing a song on a piano. 5g*{ESm@c4PWIdO43MotBR@~m Based on the bend of the finger, the current changes which we could use to send a signal to the Motor, ) We can control the Motor by mapping human gestures from X, Y, Z plane, The LED will light up when a human gesture control has been sent to the Arduino, Sending data to Robotic Arm HC-05 Receiver, The microcontroller would perform as the brains of the Robotic Glove, Robotic Glove Sending Values by bending the Flex Sensor, Configuring the Bluetooth (Master and Receiver), All other test codes and the latest version can be found on the, /* I2C slave address for the device/module.
